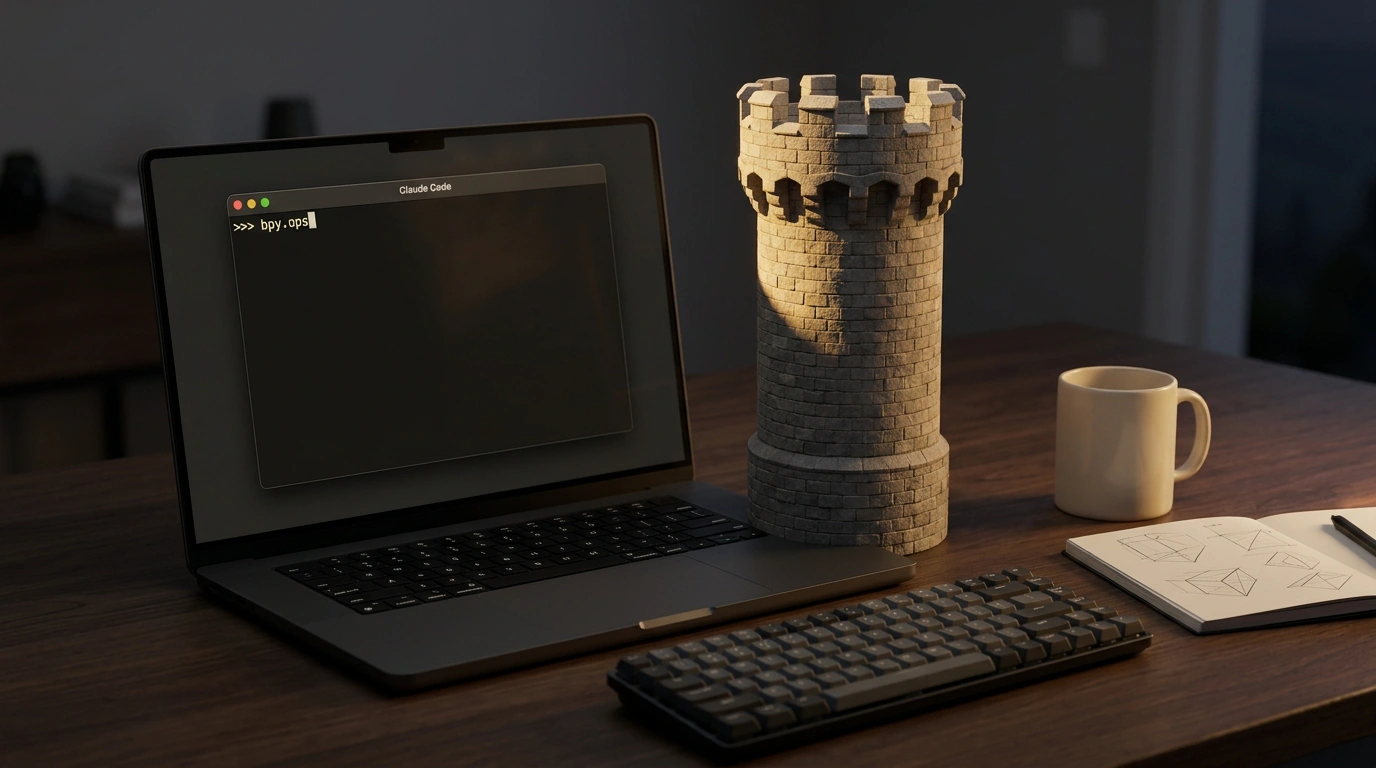
You're probably used to thinking of terminal coding assistants like Claude Code as strictly text-bound tools: fix a typo in a config file, write an API unit test, or refactor a TypeScript function. What could a command-line prompt possibly have to do with 3D graphics, millions of polygons, shaders, and volumetric lighting? Traditionally, 3D modeling has been an impenetrable fortress for language models—something requiring dozens of hours of manual clicking inside a 3D viewport.
In late 2026, however, a tectonic shift hit the technical art and indie gamedev communities. Developers realized that Claude Code's knack for reading library documentation deeply, executing local shell commands, and parsing error output step by step turns a terminal agent into a first-rate Technical Artist. We've already seen early hints of this trend in our pieces on building a 3D browser game with Claude and vibe-coding video games. Today, we're unpacking full production pipelines where Claude Code autonomously drives heavyweights like Blender and Unreal Engine 5.
From Code Edits to Orchestrating 3D Suites
Let's look at why this leap is happening right now. Pro 3D suites—Blender, Unreal Engine, Maya, Houdini—all expose exhaustive Python APIs. For a human artist, though, writing automation scripts has always been a miserable barrier: you have to juggle thousands of classes, track active object context, wire shader node trees by hand, and compute matrix transforms manually.
For a person, it's far easier to click a vertex and drag a gizmo arrow. For an AI agent, the exact opposite is true:
- Inside a visual viewport, a model struggles because it has no direct tactile input;
- Inside a Python API, an agent feels right at home, effortlessly manipulating vectors, quaternion matrices, and topological graphs;
- An agent can compute trigonometric coordinates for a hundred castle towers or scatter a thousand trees across a sloped terrain in a fraction of a second.
Claude Code acts as an intelligent coordinator: you describe the geometry and mood of a scene in plain English, and the agent handles all the heavy math and procedural asset assembly.
Architectural Bridge: How the Terminal Controls Blender via bpy
The first major automation workflow centers on open-source Blender, running through a Headless Batch Execution loop:
- Parametric Script Generation: Claude Code writes a complete Python script importing Blender's native
bpylibrary; - Background Execution: The agent invokes the Blender binary with headless flags so no GUI window ever opens:
blender --background --python generate_scene.py
- Multimodal Visual Inspection: The script positions a virtual camera, renders a test PNG frame to disk, and exits. Claude Code inspects the rendered image, checks composition, lighting, and mesh intersections, and then tweaks the script parameters accordingly.
Hands-On Implementation: A Procedural Castle Tower in Blender
Let's look at an actual script Claude Code generates to procedurally build a medieval stone tower with beveled edges and a procedural PBR material:
import bpy
import math

def clear_scene():
    bpy.ops.object.select_all(action='SELECT')
    bpy.ops.object.delete(use_global=False)

def create_castle_tower(radius=3.0, height=12.0, num_crenels=8):
    clear_scene()

    # 1. Create the cylindrical tower shaft
    bpy.ops.mesh.primitive_cylinder_add(
        vertices=32,
        radius=radius,
        depth=height,
        location=(0, 0, height / 2.0)
    )
    tower = bpy.context.active_object
    tower.name = "Tower_Base"

    # Add a Bevel modifier to smooth sharp edges
    bevel_mod = tower.modifiers.new(name="Bevel", type='BEVEL')
    bevel_mod.width = 0.08
    bevel_mod.segments = 3

    # 2. Procedurally place battlements (crenels) around the circumference
    crenel_width = (2 * math.pi * radius) / (num_crenels * 2)
    for i in range(num_crenels):
        angle = i * (2 * math.pi / num_crenels)
        x = radius * math.cos(angle)
        y = radius * math.sin(angle)
        z = height + 0.75

        bpy.ops.mesh.primitive_cube_add(
            size=1.0,
            scale=(crenel_width * 0.8, 0.4, 1.5),
            location=(x, y, z)
        )
        crenel = bpy.context.active_object
        crenel.rotation_euler[2] = angle
        crenel.name = f"Crenel_{i}"

    # 3. Build a procedural stone shader via node tree
    mat = bpy.data.materials.new(name="Procedural_Stone")
    mat.use_nodes = True
    nodes = mat.node_tree.nodes
    links = mat.node_tree.links
    nodes.clear()

    node_out = nodes.new(type='ShaderNodeOutputMaterial')
    node_bsdf = nodes.new(type='ShaderNodeBsdfPrincipled')
    node_noise = nodes.new(type='ShaderNodeTexNoise')
    node_noise.inputs['Scale'].default_value = 25.0
    node_noise.inputs['Detail'].default_value = 8.0

    node_ramp = nodes.new(type='ShaderNodeValToRGB')
    node_ramp.color_ramp.elements[0].color = (0.15, 0.15, 0.16, 1)
    node_ramp.color_ramp.elements[1].color = (0.42, 0.41, 0.40, 1)

    links.new(node_noise.outputs['Fac'], node_ramp.inputs['Fac'])
    links.new(node_ramp.outputs['Color'], node_bsdf.inputs['Base Color'])
    links.new(node_bsdf.outputs['BSDF'], node_out.inputs['Surface'])

    tower.data.materials.append(mat)
    print("Castle Tower successfully generated with procedural shaders.")

if __name__ == "__main__":
    create_castle_tower()
The script is completely self-contained: it clears the scene, generates the mesh, places mathematically spaced battlements, builds a procedural noise shader, and bakes the output into a .blend project file.
Unreal Engine Integration: Live Editor Control Over Sockets
While Blender workflows lean on batch execution, Unreal Engine 5.5+ pipelines use the interactive Python Remote Execution protocol.
Unreal Editor embeds a lightweight network listener accepting commands over a local socket. Claude Code connects straight into the running engine session and executes operations live inside the open level.
Here's what a script looks like for procedural level blocking and environment placement in Unreal Engine:
import unreal

def populate_environment_grid(asset_path, grid_size=5, spacing=400.0):
    editor_lib = unreal.EditorLevelLibrary()
    asset_lib = unreal.EditorAssetLibrary()

    # Load mesh from the project's asset library
    loaded_mesh = asset_lib.load_asset(asset_path)
    if not loaded_mesh:
        unreal.log_error(f"Failed to locate asset at path: {asset_path}")
        return

    # Procedurally place objects along a grid
    for x in range(grid_size):
        for y in range(grid_size):
            location = unreal.Vector(x * spacing, y * spacing, 0.0)
            rotation = unreal.Rotator(0.0, (x + y) * 15.0, 0.0)

            # Spawn static actor into the world
            actor = editor_lib.spawn_actor_from_object(loaded_mesh, location, rotation)
            if actor:
                actor.set_actor_label(f"Prop_Grid_{x}_{y}")

    # Create dynamic sun and directional key light
    sun_location = unreal.Vector(0.0, 0.0, 1000.0)
    sun_rotation = unreal.Rotator(-45.0, 35.0, 0.0)
    directional_light = editor_lib.spawn_actor_from_class(unreal.DirectionalLight, sun_location, sun_rotation)
    if directional_light:
        directional_light.set_actor_label("Dynamic_Sun_KeyLight")

    unreal.log("Environment grid populated successfully via Claude Code.")

if __name__ == "__main__":
    populate_environment_grid("/Game/Environment/Meshes/SM_Column_Stone", grid_size=4, spacing=500.0)
You simply type in the terminal: "Place ancient columns on a five-meter grid and angle a sunset key light at 45 degrees." Claude Code writes the script, pushes it over the Unreal Engine socket, and the viewport comes alive instantaneously.
Anatomy of Procedural Lighting and Cinematic Cameras
Claude Code truly shines when dialing in cinematic lighting and camera framing. In a traditional pipeline, lighting requires endless manual tweaking of exposure, color temperature, and reflections. With an agent, it becomes a focused dialogue:
Atmospheric shot of a 3D stone tower with volumetric fog and a cinematic sunset light beam
- Driving Lumen Global Illumination: The agent configures
PostProcessVolumesettings, dialing in Indirect Lighting Intensity and Ambient Occlusion depth; - Framing Shots via
CineCameraActor: Instead of dropping a flat static camera, the model calculates lens focal length (say, 35mm for wide establishing shots or 85mm for tight portraits), sets Depth of Field, and locks focus onto the hero asset; - Atmosphere and Volumetric Fog (
Exponential Height Fog): The script tunes horizon fog color gradients, God Ray light-shaft density, and atmospheric scattering.
The result looks like a finished film frame without spending hours scrubbing sliders across nested editor panels.
Two-Way Dialogue: How the Agent Fixes Its Own Spatial Mistakes
The biggest superpower of running Claude Code in 3D is its ability to learn from its own crashes by reading system logs:
Picture this: the agent tries to wire a stone texture onto a generated mesh in Blender, but mistypes the input socket name on a Principled BSDF node (using the older Base_Color instead of Base Color required in Blender 4.x).
- Blender crashes out with
KeyError: 'Base_Color'; - Claude Code captures
stderrfrom the console, cross-references the error against its knowledge of the current API version, and spots the mismatch immediately; - Without human intervention, it patches the script and re-runs the headless render.
That autonomous self-correction loop turns a CLI assistant into a patient, tireless partner that grinds until the render matches your brief 100%.
Indie Pipeline Economics: From Idea to Playable Prototype in One Evening
Let's run the real math for small teams and solo creators. In traditional game development, building a rough vertical slice of a mid-sized level takes a technical artist three to six weeks:
- Aligning on concept art;
- Blocking out base geometry (greybox/whitebox);
- Setting up master materials, UVs, and collision meshes;
- Baking or tuning dynamic lighting and cutscene cameras.
When Claude Code bridges your terminal, Blender, and Unreal Engine, that production cycle transforms completely:
- Interactive Brainstorming and Parameterization: You lay out the visual style and core mechanics; in 15 minutes, the agent generates parametric prototypes for all base assets;
- Parallel Batch Generation: While you grab a cup of tea, a Blender script churns out hundreds of modular walls, arches, torches, and pillars, automatically optimizing polygon counts;
- Instant Engine Assembly: An Unreal Editor script lays out the assets on a grid, builds character colliders, and tunes Lumen lighting to match the mood.
Work that used to eat a month of repetitive context-switching between apps now fits into a single productive evening on a laptop. The line between programmer, level designer, and narrative writer blurs away: one person with a clear vision and a sharp terminal agent wields the output of an entire indie studio.
Pitfalls: Where AI Still Trips in 3D Pipelines
Even with impressive automation, 3D development hides specific traps every engineer needs to watch for:
- UV Unwrapping and Organic Shapes: Models excel at regular architectural geometry (columns, towers, bridges, rooms), but ask them to procedurally unwrap complex organic folds on a face or cloth and you'll get warped texture coordinates;
- Normals and Inverted Faces: During complex boolean unions, scripts can accidentally flip face normals inside out, producing pitch-black shading artifacts under Lumen lighting;
- Polygon Bloat: AI loves overusing Subdivision Surface modifiers. If you don't cap subdivision levels in your prompt, a single scene can devour all available VRAM in seconds;
- Collisions and Physics Meshes: Never let a high-poly visual mesh act as a character collider. You must explicitly instruct the agent to generate a simplified Convex Hull collider, or the physics engine will tank frame rates to zero the moment your character jumps.
A Practical Rapid-Prototyping Workflow for Indie Studios
For indie teams and solo devs, pairing Claude Code with Blender and Unreal Engine unlocks unprecedented prototyping speed:
- Stage 1 (Greybox Blocking): Define overall level topology, room dimensions, and key landmarks via text commands in Blender;
- Stage 2 (Automated Export): Have the agent run an export script to FBX or USD with clean bone/hierarchy optimization;
- Stage 3 (In-Engine Assembly): Let an Unreal Engine script import the geometry, bind Nanite master materials, place fog volumes, and dial in dynamic Lumen lighting.
What once took weeks of mind-numbing mouse clicks across editor menus now comes together in one evening of back-and-forth with a terminal agent. Spatial creation has officially joined the applied AI stack.